 US Dollar
 Australian Dollar
 Euro
 CAD

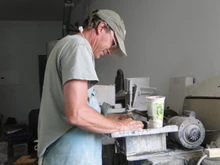
Unfortunately, actually cutting rocks does require specialized lapidary equipment. Rocks vary in hardness, but many contain quartz or similar materials that are much harder than metals or wood.
The first piece of equipment you will need is a lapidary saw. In fact, you may need several saws, depending on how big of rocks you intend to cut, and different saws are designed for different stages of the cutting process.
Larger lapidary slab saws are designed to produce controlled, precise cuts while minimizing damage to the material. They usually operate with water or oil coolant.
Slab saws cut larger rough rocks of all shapes and sizes into smaller blocks or slabs. They are usually referred to by their blade size. A 48-inch slab saw is huge and uses blades up to 48" in diameter! We recommend an 18 inch one to start.
Once you have cut your rough rock into blocks or slabs you will move to a trim saw. A trim saw has a small, thin blade, that is made for cutting small stones into even smaller pieces. You can use them to cut small rough rock pieces into slabs, or cutting a flat edge for cabochons, or cutting slabs into cubes for cabochons. Trim saws come in 6-inch to 12-inch in width, but a 10-inch is a nice middle of the road starter. A 10-inch saw can only cut a rock that is 3.5-4 inches thick.
There are several different types of blades you can use. You will need to use diamond blades. These blades are coated with industrial diamonds. Diamonds are the hardest natural material, allowing the blade to grind through extremely hard minerals such as quartz. You should experiment with different blades to find the blades you prefer.
Here is probably the best place to remind you to use safety gear. Cutting rocks produces dust, debris, and sharp fragments, so proper protection is essential. Safety gear to consider include safety glasses to protect the eyes, dust masks or respirators to prevent inhaling fine particles, hearing protection when working with loud equipment and rubber finger tips. A plastic apron is also nice when standing at a trim saw!
Now we choose the rock we intend to cut. It helps to do a little research first on the rock. Rocks can vary greatly in hardness-which will change how we cut it, from what type of blade or sanding belt we need, to what type of polish we will use. Some rocks do require special “treating” before you can cut it. Turquoise is a good example and almost always needs to be stabilized. Some rocks you can “treat” by using a surface resin, like super glue or Opticon. When you first start out, we recommend you start with a rock with a consistent hardness of about 7. The chalcedonies (agates, jaspers, petrified woods, and cherts) and Quartzes are good choices. Softer stones grind easier, but it's easier to grind too much away. Also, be aware that softer stones can be harder to get a good polish on.
If you are choosing chatoyant or iridescent rocks, you also have to orient the rock to get the best flash. Here is an article on cutting Tiger-Eye to get you started.
Before making any cuts, take time to study the rock. Look for visible fractures, weak spots, or areas where patterns or good color may appear. Wetting the surface of the stone can often make colors and banding easier to see. It is important to orient the rock in the saw to get the best patterned pieces or slabs. Sometimes you can’t really tell what’s inside a rock and you just have to make a blind cut to start!
If you want to apply a surface resin you may want to start here. You can heat the rock on a very low temperature to make it more porous, (work outside and consider wearing a mask as the stuff stinks!) with super glue just squirt it on, with Opticon coat it while wearing gloves and using cotton balls.
Place the rock securely in the slab saw vise or clamp. Keeping the stone stable prevents it from shifting during the cut. If necessary, use wood blocks to get the rock positioned the way you want. A secure rock helps produce straight slabs and reduces the risk of damaging the blade.
Turn on the saw and allow the blade to gradually cut through the stone. Allow the saw to work at its natural pace.
For cabochons you will cut slabs that are about 4-8 mm thick. You may wish to cut thicker slabs so you can butterfly them into matched pairs.
You can also cut a base on a rock you intend to do a polished piece out of, cut out blocks to process into other shapes or items, or even cut cubes for spheres too!
You should reexamine the rock after each cut to make sure it hasn’t slipped in the vice and you are still cutting it for the best pattern.
Now if you are cutting a cabochon, it is time to move to the trim saw. Once again, you may want to pretreat the rock with a resin coating. Mark out on the slabs the best spots for color and pattern and trim the slab into preforms. They don’t have to be exactly perfect or shaped. Just roughly cut or trim out the pieces that you believe will make a good cabochon.
If you start with the trim saw, basically the all of the above advice is the same. Many experienced or commercial cutters will hand-feed the rock. Especially once you get down to the trimming of preforms. But this takes practice and you must be careful not to push the rock. Pushing too quickly can damage both the blade and the stone.
Using a stencil and a scribe, or pencil, you can now draw your cabochon shape on the preforms, then use a 6-inch trim saw to saw off the excess within about a millimeter of your lines. You will need to decide which side of your preform has the best color and pattern and should be the top of your cabochon. Then it’s time to move to the grinder!
Check out my blog on Setting Up a Beginner Lapidary Shop here.
Or click the hashtag "Rock Cutting" below to see all my blogs on cutting and polishing rocks!
In future blogs we will examine grinding, sanding and polishing!
Happy hunting!